
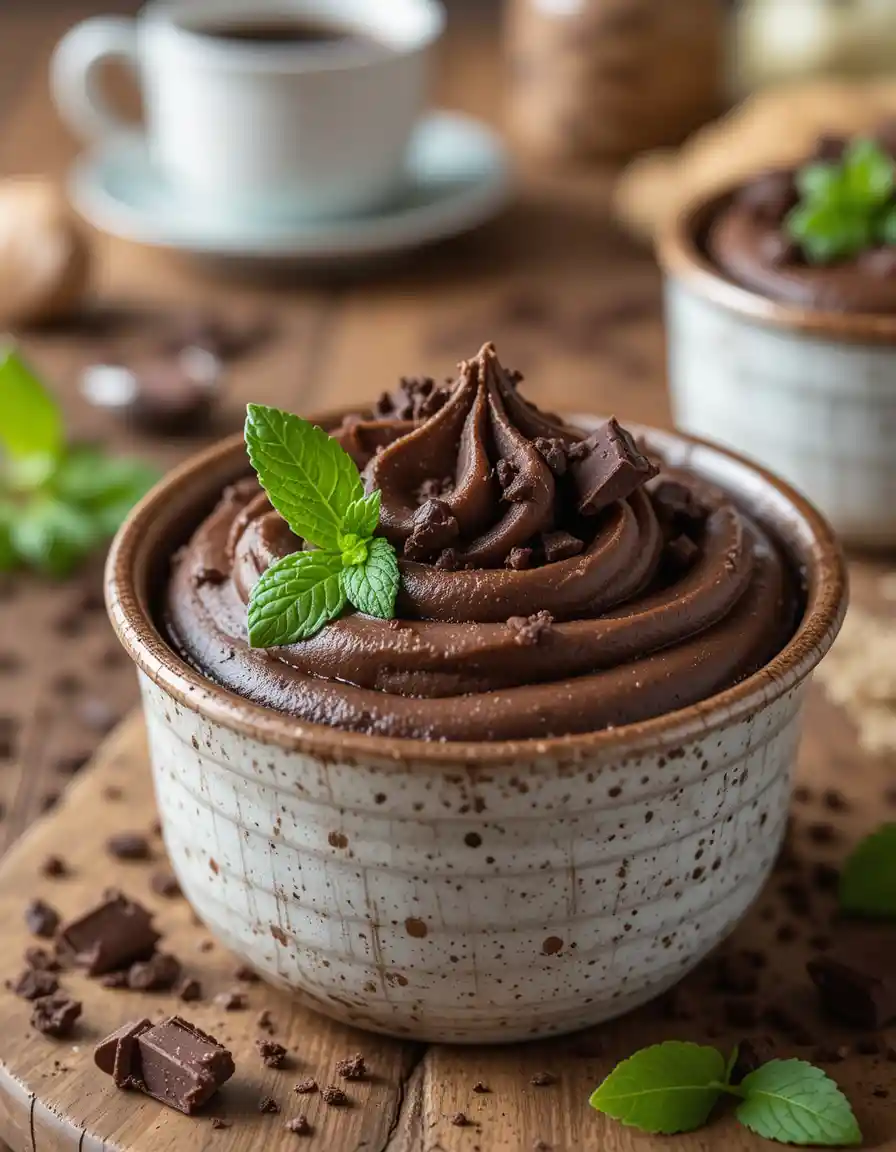
3 Ingredient Chocolate Mousse
Looking for a dessert that’s quick, easy, and foolproof? This 3 Ingredient Chocolate Mousse is like sweet insurance for your kitchen—simple ingredients, minimal effort, and guaranteed deliciousness every time. No need to stress about complicated recipes or pricey bakery runs.
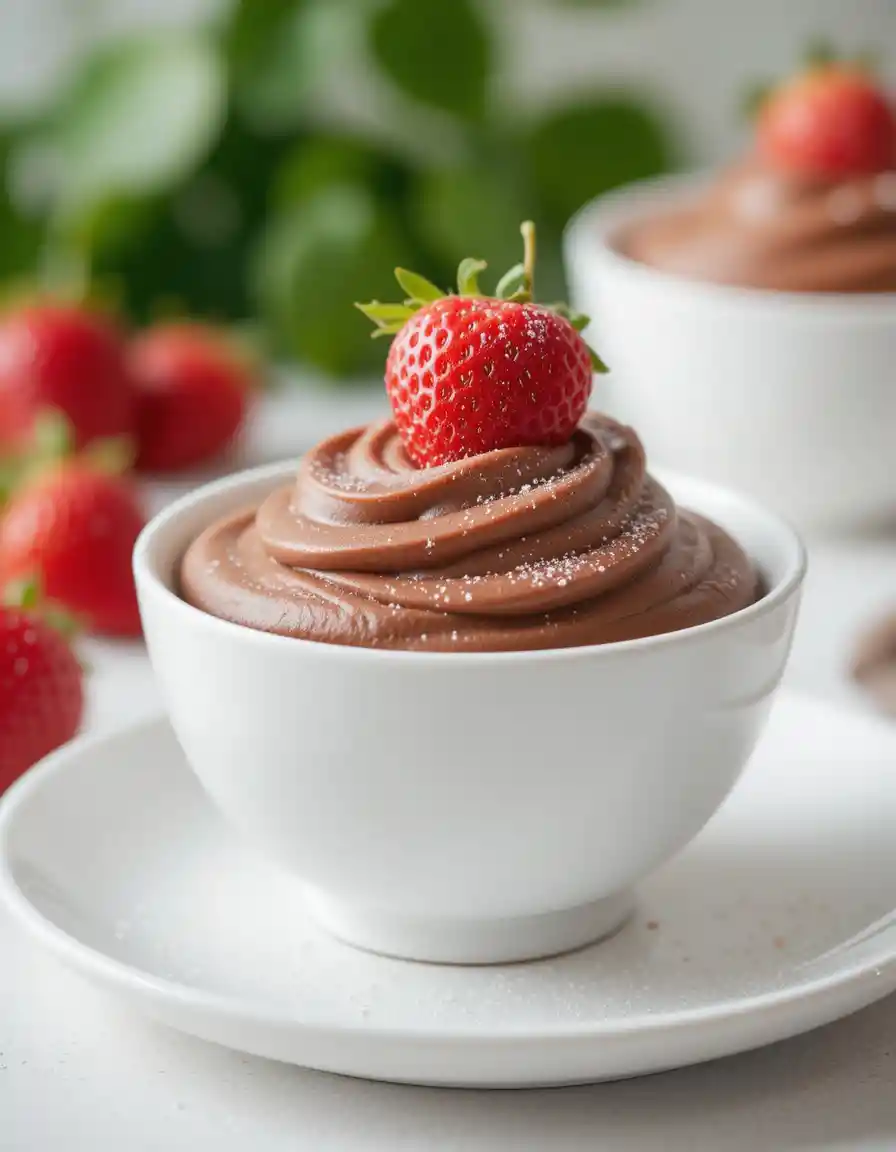
By using premium chocolate brands and basic pantry staples, you get a rich, creamy treat that’s kind to your budget and your taste buds. Whether you’re whipping it up for family, friends, or a last-minute celebration, this mousse delivers flavor without the fuss.
Plus, if you’re watching your health or dietary needs, you can easily swap ingredients to create low-calorie dessert options or even try a vegan dessert recipe—all without sacrificing that decadent chocolate flavor.
Ready to master this quick, crowd-pleasing dessert? Let’s dive in and make magic happen!
My Ltest Recipes

Vinícius Jr. Transfer to Chelsea: Truth Behind the Rumor, Facts & Insights

Before You Buy Exercise Equipment – Save Money & Time

You Won’t Believe What Ronaldo Just Said About African Football

Cristiano Ronaldo Fast & Furious 11 Trailer: Real or Viral Rumor?

This Was Never Supposed to Go Public – The PSG Leak Explained
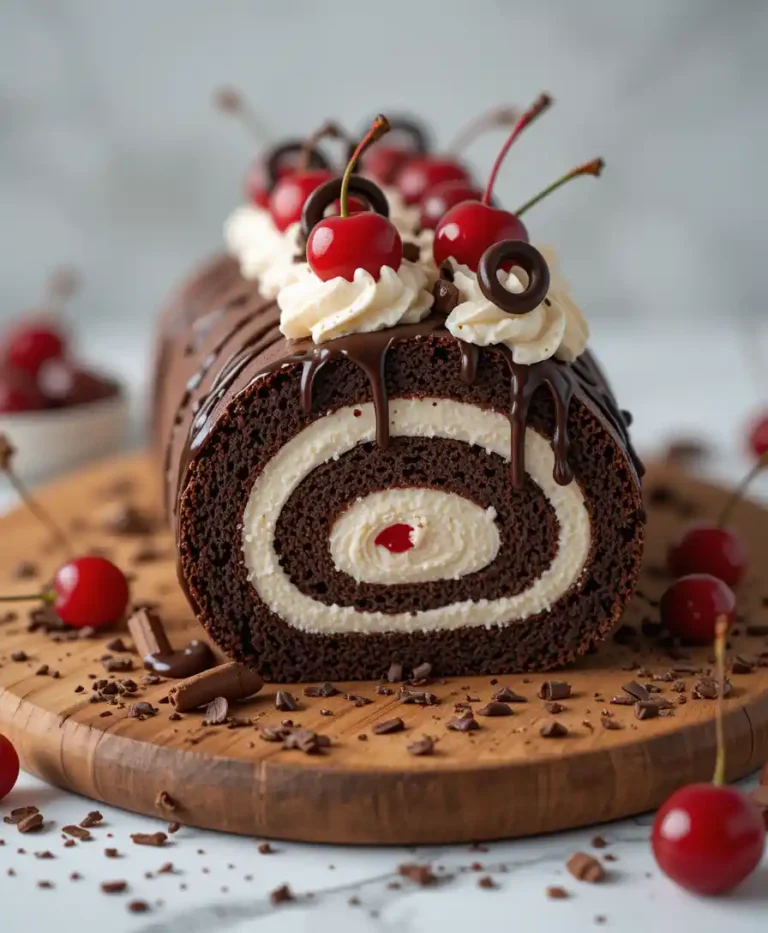
Chocolate Swiss Roll Cake
What You’ll Need: Ingredients & Essential Equipment
Making this 3 Ingredient Chocolate Mousse couldn’t be easier, and the best part? You don’t need fancy or expensive gear to get started.
Ingredients:
- Premium chocolate (dark or semi-sweet) — Choose quality brands for rich flavor and better results. Investing in premium chocolate brands pays off in taste and texture.
- Heavy cream (or coconut cream for a dairy-free option) — Look for organic or grass-fed options if you want a healthier, indulgent touch.
- Eggs (or aquafaba for a vegan twist) — Fresh eggs make all the difference in achieving that perfect mousse fluff.
Essential Equipment:
- Mixing bowls — Glass or stainless steel work best.
- Electric mixer or whisk — An electric hand mixer makes whipping cream a breeze, but a sturdy whisk works fine if you’re up for a little arm workout. High-quality kitchen appliances can save time and guarantee perfect texture.
- Spatula — For folding ingredients gently and evenly.
Bonus Tip:
If you’re serious about your baking game, consider investing in some budget-friendly kitchen equipment like a stand mixer or a precision scale. These tools not only improve consistency but also last for years, making them a smart kitchen investment.
How to Make 3 Ingredient Chocolate Mousse: Step-by-Step Guide
Ready to whip up this delicious dessert? Follow these simple steps for a rich, creamy mousse that’s perfect for any occasion — no expensive ingredients or fancy skills needed!
Step 1: Melt the Premium Chocolate
Start by gently melting your premium chocolate brands over a double boiler or microwave. Using high-quality chocolate ensures a smooth texture and rich flavor that rivals costly bakery desserts. This small investment in premium ingredients pays off big in taste.
Step 2: Whip the Cream
In a chilled bowl, use an electric mixer to whip heavy cream until soft peaks form. For a healthier twist, swap in coconut cream or aquafaba to create low-calorie dessert options or vegan dessert recipes. Investing in reliable kitchen appliances like a quality hand mixer can save time and deliver perfect results every time.
Step 3: Fold Chocolate and Cream Together
Carefully fold the melted chocolate into the whipped cream using a spatula. This technique keeps the mousse light and airy — key to a professional texture without professional costs.
Step 4: Chill and Serve
Pour the mousse into serving dishes and refrigerate for at least one hour. Chilling helps the mousse set perfectly and melds the flavors. Planning a party? This dessert is a budget-friendly recipe that impresses without inflating your costs.
Pro Tips:
- Choose premium baking chocolate to boost flavor and richness.
- Use a budget-friendly electric mixer for quick, effortless whipping.
- Consider portion control for those looking for low-calorie sweets or healthier dessert options.
Now that you’ve mastered this easy, crowd-pleasing chocolate mousse, you’ve got dessert success practically insured. Up next, we’ll dive into exciting variations and twists—including vegan and alcohol-infused options—so you can customize your mousse and keep your kitchen game strong without breaking your budget or your insurance plan. Let’s make this classic dessert truly your own!
More Easy Quick Recipes
Vinícius Jr. Transfer to Chelsea: Truth Behind the Rumor, Facts & Insights
Before You Buy Exercise Equipment – Save Money & Time
Variations and Twists: Make It Your Own
Once you’ve nailed the classic 3 Ingredient Chocolate Mousse, why not switch things up? These tasty variations keep your dessert game fresh while respecting your budget and even your kitchen appliance insurance by avoiding extra gadgets.
Boozy Bliss
Add a splash of your favorite liqueur—like Kahlúa or Bailey’s—for an indulgent twist. Perfect for adult parties, this upgrade pairs well with premium chocolate brands to deliver a rich, luxurious flavor.
Vegan & Health-Conscious
Swap heavy cream with coconut cream and eggs with aquafaba to create a delicious vegan dessert recipe. It’s a guilt-free choice that fits perfectly into low-calorie dessert options and those watching sugar intake.
Fruity Flair
Mix in fresh raspberries or orange zest for a burst of natural flavor. These simple add-ins keep your mousse exciting while staying budget-friendly and easy to prep.
Sugar-Free Version
Use sugar substitutes like stevia or erythritol to make a diabetic-friendly dessert that doesn’t compromise on taste. This is a smart choice for anyone with dietary restrictions but who still wants a decadent treat.
No matter your twist, you’re crafting a dessert that’s not only delicious but also smart — protecting your time, wallet, and even your kitchen insurance by keeping things simple and efficient.
Health & Nutrition Facts: Is This Dessert Guilt-Free?
When it comes to indulgence, knowing what’s inside your dessert matters—especially if you’re mindful about your health or managing dietary restrictions. The great news? This 3 Ingredient Chocolate Mousse can be both delicious and surprisingly guilt-free.
Using premium chocolate brands with a higher cocoa percentage means you get more antioxidants and less sugar, a smart choice if you’re aiming for a low-calorie dessert option. Plus, swapping heavy cream for coconut cream or using aquafaba lets you create vegan dessert recipes that align with healthier lifestyles.
For those concerned about overall wellness, it’s always a good idea to check your health insurance benefits related to diet and nutrition counseling—it’s a clever way to stay proactive about your eating habits.
Here’s a quick nutrition snapshot per serving (approximate values):
- Calories: 220–280 (depending on ingredients)
- Fat: 18g (mostly from cream or coconut cream)
- Sugar: 12g (less if you opt for sugar substitutes)
- Protein: 3g
Want to keep it even healthier? Try reducing sugar or opting for natural sweeteners, and pair your mousse with fresh fruit for added fiber and vitamins.
This dessert proves you don’t have to sacrifice flavor for health — a perfect balance for anyone watching their diet but craving a rich chocolate fix.
Why This Recipe Saves You Money & Time
When life gets busy, finding a dessert that’s quick, tasty, and budget-friendly feels like hitting the jackpot. This 3 Ingredient Chocolate Mousse recipe delivers just that — saving you both time and money without compromising on flavor.
By using just three simple ingredients, you avoid splurging on expensive bakery treats or fancy kitchen gadgets, which also helps keep your kitchen appliance insurance costs down. Plus, relying on pantry staples means fewer grocery runs, making this a perfect budget-friendly recipe for busy households.
The quick prep time—just about 10 minutes before chilling—makes it one of the best quick dessert recipes to whip up when you want something impressive but fuss-free. No need to waste hours baking or cleaning up piles of dishes!
In short, this mousse is a smart choice whether you’re planning a party or simply treating yourself, proving that great taste and convenience can go hand in hand.
Top Trending Recipes
Vinícius Jr. Transfer to Chelsea: Truth Behind the Rumor, Facts & Insights
Before You Buy Exercise Equipment – Save Money & Time
You Won’t Believe What Ronaldo Just Said About African Football
Cristiano Ronaldo Fast & Furious 11 Trailer: Real or Viral Rumor?
This Was Never Supposed to Go Public – The PSG Leak Explained
Chocolate Swiss Roll Cake
Where to Buy Quality Ingredients & Tools Online
Getting the best results starts with using quality ingredients and reliable tools — but you don’t have to break the bank to find them. Here’s where you can score top-notch products online that fit your budget and elevate your 3 Ingredient Chocolate Mousse game.
Premium Chocolate
Look for premium chocolate brands available on trusted online stores like Amazon, specialty gourmet shops, or subscription services that deliver fresh, high-quality chocolate right to your door. Buying premium chocolate online often comes with discounts or bundle deals that save you money.
Heavy Cream & Alternatives
Organic or grass-fed heavy cream can be found at local grocers or health food stores, but you can also order dairy-free options like coconut cream from online health markets. Keep an eye out for affordable baking tools or ingredient bundles that include these essentials.
Kitchen Equipment
A good electric mixer or hand whisk is a must-have for mousse perfection. Check out websites offering the best kitchen appliance deals with seasonal discounts or coupon codes. Investing in budget-friendly, durable kitchen tools not only improves your cooking but also helps keep your kitchen appliance insurance in check.
Specialty Stores & Subscription Boxes
For a continuous supply of quality ingredients, consider subscription boxes tailored for baking enthusiasts. These often include exclusive offers, seasonal ingredients, and curated baking essentials — all delivered to your doorstep with no hassle.
Shopping smart means you get the best flavor, quality, and value — making your dessert adventures both delicious and budget-savvy.
Nutritional Information & Recipe Details
Here’s a quick snapshot of the essentials you need to know before diving into this delicious, budget-friendly dessert. Perfect for those tracking nutrition or managing meal prep efficiently.
| Detail | Information |
|---|---|
| Preparation Time | 10 minutes |
| Cooking Time | 0 minutes (no baking required) |
| Total Time | 1 hour (includes chilling) |
| Type | Dessert |
| Cuisine | American / International |
| Recipe Yield | 4 servings |
| Calories | Approximately 220–280 per serving* |
*Calories vary based on ingredient choices, like the type of chocolate and cream. Opting for low-calorie dessert options or dairy alternatives can reduce calories further.
The Latest Recipes
Vinícius Jr. Transfer to Chelsea: Truth Behind the Rumor, Facts & Insights
Before You Buy Exercise Equipment – Save Money & Time
You Won’t Believe What Ronaldo Just Said About African Football
Cristiano Ronaldo Fast & Furious 11 Trailer: Real or Viral Rumor?
This Was Never Supposed to Go Public – The PSG Leak Explained
Chocolate Swiss Roll Cake
Final Thoughts: A Sweet Deal in Every Spoonful
Whipping up this 3 ingredient chocolate mousse isn’t just a win for your sweet tooth—it’s a smart, budget-friendly decision that saves you both time and money. With zero baking, minimal cleanup, and ingredients that don’t break the bank, you’re investing in a dessert that pays off big—just like a good insurance policy for your cravings.
Whether you’re planning a quick treat after dinner or impressing guests without stress, this mousse delivers luxury with every bite—no credit check required.
So go ahead—indulge wisely, save smartly, and remember: the sweetest investments are the ones you can taste.
Related Recipes You Will Love
Frequently Asked Questions About 3 Ingredient Chocolate Mousse
1. Can I make this mousse ahead of time?
Absolutely! This mousse actually gets better as it chills. You can prepare it 12–24 hours in advance, making it a stress-free option for entertaining or busy weeknights. That’s time management worth insuring.
2. Is this recipe budget-friendly for families?
Yes! With just three simple ingredients, it’s one of the best budget-friendly dessert options out there. It’s a sweet reward without the financial guilt—like getting great coverage at a low cost.
3. What if I don’t have a hand mixer?
No worries—you can still make this recipe with a good old-fashioned whisk. It may take a bit longer, but it’s a small investment of effort with a delicious return.
4. Is this mousse healthy?
While it’s definitely an indulgence, using dark chocolate and dairy alternatives can reduce sugar and saturated fats. For those watching their health insurance or wellness goals, moderation and smart ingredient swaps go a long way.
3 Ingredient Chocolate Mousse

This 3 ingredient chocolate mousse is a rich, creamy, and elegant no-bake dessert made with just chocolate, cream, and a touch of sweetness. It’s quick to prepare, beginner-friendly, and perfect for both casual treats and special occasions.
- Mixing bowl
- Hand mixer or whisk
- Heatproof bowl
- Saucepan or double boiler
- Serving cups or ramekins
- 150 g dark chocolate (at least 60% cocoa)
- 1 cup heavy cream (cold)
- 1 –2 tablespoons powdered sugar (optional)
- Break the dark chocolate into small pieces and melt it slowly over a double boiler or carefully in short bursts in the microwave. Once melted, let it cool until it’s just warm to the touch—too hot will affect the cream later.
- Pour the chilled heavy cream into a clean bowl and whip it gently until it forms soft peaks. If you want a sweeter mousse, sprinkle in the powdered sugar while whipping. Be careful not to overbeat; the cream should still feel light and airy.
- Slowly fold the cooled chocolate into the whipped cream using a spatula. Use gentle, sweeping motions to combine them evenly without losing the fluffy texture. Work in batches for the best results.
- Divide the mousse evenly into serving glasses or ramekins. Cover and chill in the fridge for at least one hour to let it set and develop its signature silky texture. Serve chilled and enjoy!
Use quality chocolate: The flavor of your mousse depends heavily on the chocolate you choose. Opt for a good-quality dark chocolate with at least 60% cocoa for rich, balanced taste.
Don’t overwhip the cream: Whip until soft peaks form for the perfect light and airy mousse. Overwhipping can make the mousse too stiff or grainy.
Customize sweetness: Powdered sugar is optional. Adjust according to your taste or skip it entirely if your chocolate is already sweet enough.
Chill time matters: For best texture and flavor, refrigerate the mousse for at least 1 to 2 hours. Overnight chilling works even better and makes serving easier.
Make ahead: This mousse can be prepared a day in advance and stored in the fridge, making it a great choice for entertaining or busy days.
Leave a quick review and let me know how it went!