
Matilda Cake
Picture this: You’re standing in your kitchen, admiring a towering chocolate cake so rich and decadent that just looking at it makes your mouth water. That’s the iconic Matilda cake – the chocolate masterpiece that had us all dreaming of taking a big bite during that unforgettable scene from Roald Dahl’s classic tale. Remember when Bruce Bogtrotter faced down that massive slice while the entire school watched? Now you can bring this legendary dessert to life in your kitchen, without any scary headmistress lurking nearby!
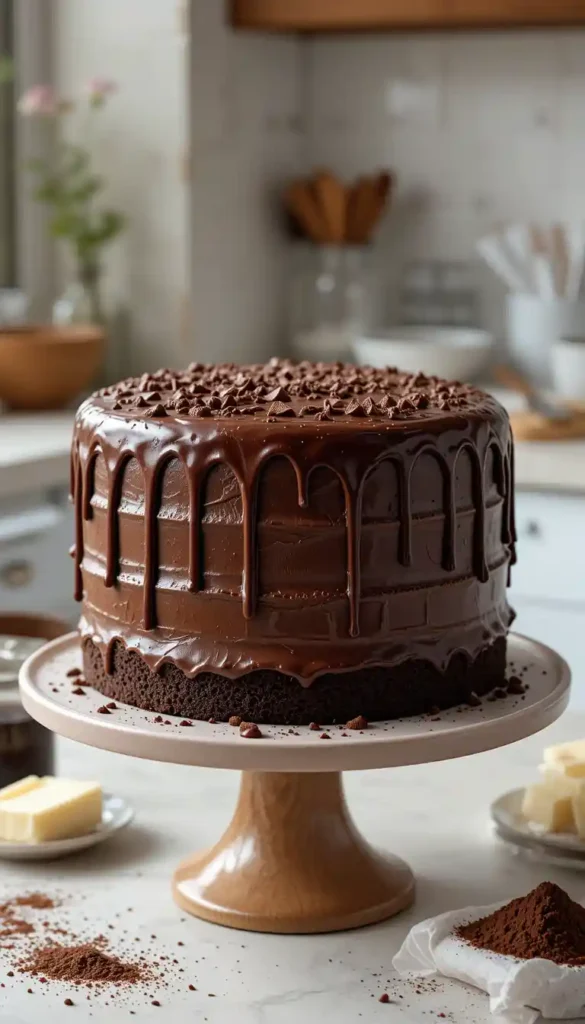
This Matilda chocolate cake isn’t just another dessert recipe – it’s a chance to recreate a piece of childhood nostalgia that tastes even better than it looks in the movie. The combination of moist chocolate layers wrapped in velvety frosting creates a cake that’s perfect for birthdays, celebrations, or simply treating yourself after a long week. Ready to channel your inner Bruce and conquer this chocolate mountain? Let’s get baking!
Table of Contents
The Magic Behind the Matilda Cake
What Makes the Matilda Cake Special?
The Matilda cake stands apart from ordinary chocolate cakes in several remarkable ways. Based on the unforgettable dessert from Roald Dahl’s beloved story, this chocolate creation has earned its legendary status for good reason.
First, the cake itself features incredibly moist chocolate sponge layers that practically melt in your mouth. The texture is the perfect balance – firm enough to maintain its shape, yet tender enough to effortlessly give way to your fork. Each bite delivers a rush of deep chocolate flavor that’s rich without being overwhelming.
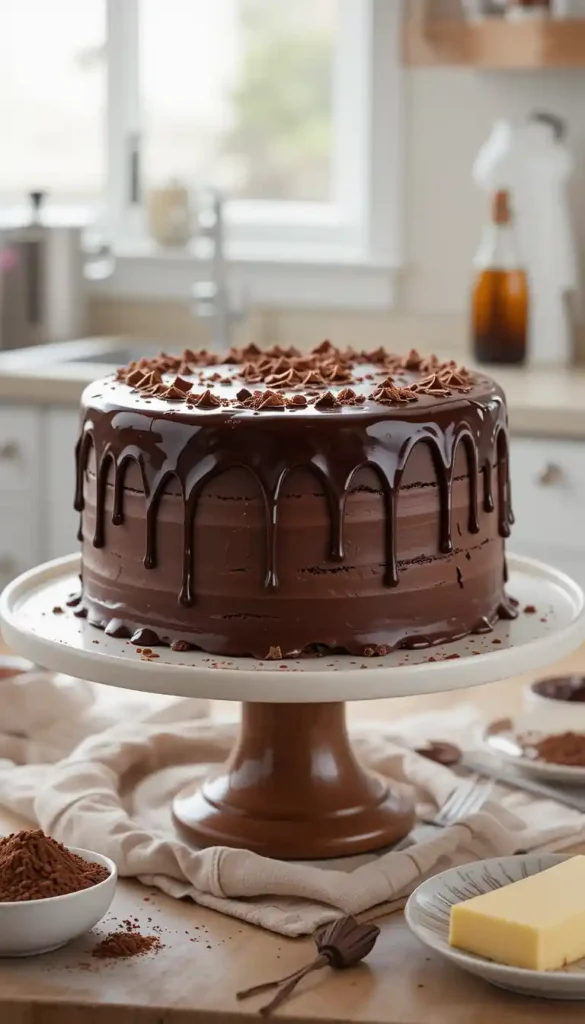
Then there’s that frosting-oh, that frosting! The thick, fudgy chocolate icing creates both the dramatic look and the decadent taste that makes this cake so memorable. When applied generously between layers and around the exterior, it creates that distinctive towering appearance that makes everyone’s eyes widen when you bring it to the table.
“Bruce Bogtrotter’s chocolate cake became a symbol of rebellion and sweet victory that captivated readers and viewers alike.”
What truly sets the Matilda cake apart is how it transforms an ordinary chocolate cake into something extraordinary through its perfect balance of sweetness, chocolate intensity, and impressive presentation. It’s the kind of dessert that creates instant celebration wherever it appears.
Ingredients You’ll Need
For the Chocolate Cake
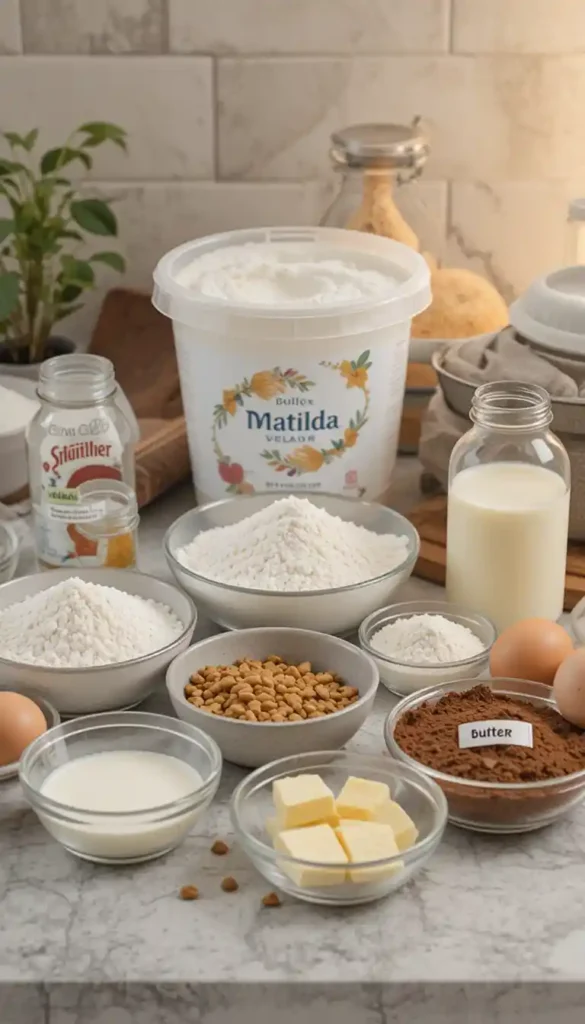
Before you start mixing, gather all these ingredients to ensure your Matilda cake turns out perfectly. Each component plays an important role in creating that legendary chocolate flavor and texture.
| Ingredient | Amount | Notes |
|---|---|---|
| All-purpose flour | 2 cups | Sift it for the best texture |
| Granulated sugar | 2 cups | Creates perfect sweetness |
| Unsweetened cocoa powder | 3/4 cup | Creates a moist texture |
| Baking powder | 2 tsp | Ensures proper rise |
| Baking soda | 1 1/2 tsp | For perfect texture |
| Salt | 1 tsp | Balances sweetness |
| Eggs | 2 large | Room temperature works best |
| Whole milk | 1 cup | Adds necessary moisture |
| Vegetable oil | 1/2 cup | Creates moist texture |
| Vanilla extract | 2 tsp | Enhances flavor |
| Hot coffee | 1 cup | Intensifies chocolate flavor |
For the Chocolate Fudge Frosting
The frosting is what transforms this from a good chocolate cake into a true Matilda cake. Don’t skimp on these ingredients – they’re essential for that authentic fudgy coating.
| Ingredient | Amount | Notes |
|---|---|---|
| Unsalted butter | 1 cup | Room temperature |
| Unsweetened cocoa powder | 1 1/4 cups | Sift to remove lumps |
| Powdered sugar | 4 cups | Sift for smoothness |
| Heavy cream | 1/3 cup | Creates perfect texture |
| Vanilla extract | 2 tsp | Adds depth of flavor |
| Salt | 1/4 tsp | Balances sweetness |
Equipment Needed for Your Matilda Cake
Baking becomes much easier when you have the right tools at hand. Here’s everything you’ll need to bring your magnificent Matilda cake to life:
- Two 9-inch round cake pans – Ideal for baking evenly sized layers that stack beautifully.
- Parchment paper – keeps the cake from sticking and ensures effortless removal from the pans.
- Stand mixer or hand mixer – For perfect batter and frosting consistency
- Mixing bowls – Have at least two sizes on hand for wet and dry ingredients.
- Measuring cups and spoons – Essential for precise ingredient measurements.
- Cooling rack – Ensures even cooling of your cake layers
- Cake turntable – Optional but helpful for frosting evenly
- Offset spatula – Makes frosting application much smoother
- Cake server – For presenting those perfect slices
Having all your tools and ingredients prepped ahead of time makes baking smoother, faster, and a lot more enjoyable! Nothing disrupts your baking flow like realizing you’re missing a crucial tool halfway through!
Step-by-Step Recipe Instructions
Preparing the Cake Batter
Creating the perfect Matilda cake starts with proper preparation. Follow these steps carefully to achieve that moist, rich chocolate batter:
- Preheat your oven to 350°F (175°C). Grease your cake pans thoroughly, then line the bottoms with parchment paper circles and grease again. A light dusting of cocoa powder (instead of flour) prevents white marks on your chocolate cake.
- Mix dry ingredients thoroughly in a large bowl. Whisk the flour, sugar, cocoa powder, baking powder, baking soda, and salt together until the mixture is well combined and smooth, with no lumps remaining.
- Combine wet ingredients in a separate bowl. Whisk the eggs, milk, oil, and vanilla extract until smooth and well blended.
- Slowly pour the wet ingredients into the dry mixture, whisking gently until everything is fully combined and smooth. Use a mixer on medium speed for about 2 minutes until the batter becomes smooth. Scrape down the sides of the bowl occasionally to ensure everything mixes evenly.
- Add hot coffee slowly while mixing on low speed. The batter will become quite thin – don’t worry, this is exactly what you want! The thin consistency creates that signature moist texture that makes the Matilda cake so special.
Baking the Perfect Cake Layers
Now that your batter is ready, it’s time to transform it into those perfect chocolate cake layers:
- Divide batter evenly between your prepared pans. For precision, you can use a kitchen scale to ensure equal amounts in each pan.
- Bake for 30-35 minutes until a toothpick inserted into the center comes out clean or with just a few moist crumbs. The cake should spring back slightly when touched in the center.
- Cool in pans for exactly 10 minutes – set a timer! This timing allows the cakes to set enough for handling but prevents them from sticking to the pans.
- Allow to cool completely on wire racks before frosting. Rushing this step can lead to melted frosting and structural problems, so give your layers at least 1-2 hours to reach room temperature.
Making the Fudge Frosting
The frosting is what gives a Matilda cake its iconic charm—lush, deeply chocolatey, and indulgently thick. Here’s how to craft that irresistible fudgy layer:
- Beat the butter in a large mixing bowl on medium-high speed for 2–3 minutes, until it’s light, creamy, and fluffy in texture. The butter should lighten in color and increase slightly in volume.
- Add cocoa powder gradually while mixing on low speed. This helps avoid a cocoa dust cloud and ensures that the ingredients blend smoothly together.
- Incorporate powdered sugar one cup at a time, alternating with small amounts of cream. This gradual addition prevents lumps and helps achieve the perfect consistency.
- Mix until smooth and add vanilla and salt. Beat on medium-high speed for another 2-3 minutes until the frosting becomes light and fluffy while remaining rich and fudgy.
- Adjust consistency if needed. If the frosting seems too thick, add a bit more cream, one tablespoon at a time. If the frosting is too thin, gradually add more powdered sugar, starting with a quarter cup at a time.
Assembling Your Matilda Cake
Now comes the fun part – bringing all the components together to create that towering chocolate masterpiece:
- Level cake layers if they have domed tops. Use a long serrated knife to carefully slice off any raised centers for perfectly flat layers.
- Place the first cake layer on your serving plate or cake stand. To keep it stable, add a small dollop of frosting underneath as a base to prevent sliding.
- Add a frosting layer to the top of the first cake. Spread about 1 cup of frosting evenly across the surface, extending slightly beyond the edges.
- Gently place the second cake layer on top of the frosting, ensuring it’s centered and aligned with the first layer. Place it bottom-side up for the flattest surface on top of your cake.
- Frost the entire cake with the remaining frosting. Start with a thin “crumb coat” over the entire cake, chill for 15 minutes, then apply the final thick, generous layer that gives the Matilda cake its signature look. Create decorative swirls on top using the back of a spoon or an offset spatula.
Pro Tips for a Perfect Matilda Cake
Want to ensure your Matilda cake turns out perfect? Here are some expert tips that make all the difference:
- Use room temperature ingredients for better incorporation, especially eggs and milk. Cold ingredients can lead to a lumpy batter and may impact the cake’s texture, so it’s best to bring them to room temperature before using them.
- Coffee enhances chocolate flavor, giving it a deeper richness, without imparting any noticeable coffee taste to the cake.
- If you’re concerned about caffeine, decaf works perfectly. The hot liquid also helps bloom the cocoa powder, intensifying its flavor.
- Refrigerate layers briefly (about 30 minutes) before frosting for easier handling. This firms up the cake just enough to prevent crumbling without drying it out.
- Crumb coat the cake by applying a thin layer of frosting first, then chilling for 15-20 minutes before the final frosting. This seals in any loose crumbs for a cleaner final appearance.
- Use a hot knife for clean slices when serving. Dip your knife in hot water, wipe it dry, and then slice through the cake for clean, smooth cuts. Repeat between each slice for picture-perfect servings.
Matilda Cake Variations to Try
Once you’ve mastered the classic Matilda cake, consider trying these delicious variations:
Matilda’s Double Chocolate Version
For serious chocolate lovers, take your Matilda cake to the next level by folding 1 cup of semi-sweet chocolate chips into the batter just before pouring it into the pans. Replace the frosting between layers with a rich chocolate ganache made from equal parts heavy cream and chocolate.
Bruce’s Mega Matilda
Create an even more impressive Matilda cake by making 1.5 times the recipe to create three cake layers instead of two. Between each layer, spread a thick layer of chocolate fudge filling (2 cups chocolate chips melted with 1 cup heavy cream and cooled until spreadable). This version truly lives up to Bruce Bogtrotter’s legendary challenge!
Miss Honey’s Lighter Take
For a slightly less intense version, reduce the sugar in the cake by 1/4 cup and add a thin layer of raspberry jam between the cake layers before applying the frosting. The subtle tartness of the berries beautifully balances the rich chocolate, creating a more refined variation of the classic Matilda cake.
Serving and Storing Your Matilda Cake
Perfect Serving Suggestions
Your magnificent Matilda cake deserves to be presented and enjoyed properly:
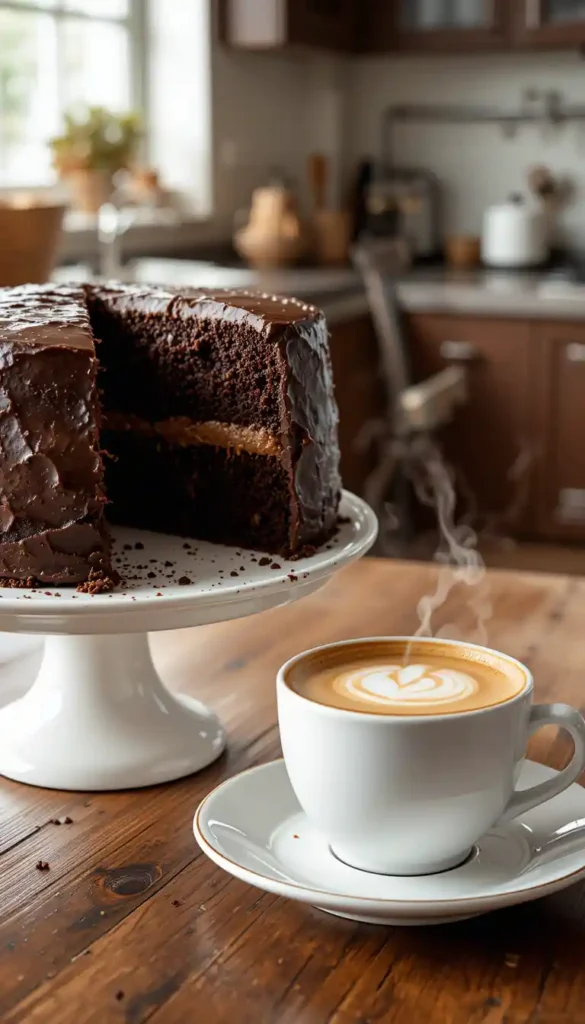
- For the best flavor and texture, serve the cake at room temperature. If refrigerated, remove the cake about 1-2 hours before serving.
- Pair it with a scoop of vanilla ice cream or a dollop of lightly sweetened whipped cream to enhance the rich chocolate flavor.
- Garnish individual slices with fresh raspberries or strawberries, chocolate shavings, or a light dusting of cocoa powder for an extra-special presentation.
- Cut smaller slices than you might with other cakes – the Matilda cake is quite rich, and a little goes a long way!
Storing Your Cake
To keep your Matilda cake fresh and delicious:
- Store at room temperature under a cake dome or loosely covered with plastic wrap for 2-3 days to maintain its freshness. The cake improves in flavor on day 2!
- Refrigerate for longer storage, up to 1 week. Place in an airtight container or cover cut edges with plastic wrap to prevent drying out.
- You can freeze unfrosted cake layers for up to 3 months. Wrap each layer individually in plastic wrap, then aluminum foil. Thaw overnight in the refrigerator before frosting.
- Freeze frosted cake by placing it unwrapped in the freezer until solid (about 4 hours), then wrapping well in plastic wrap and foil. Thaw the cake layers overnight in the refrigerator, and then let them come to room temperature before serving for the best texture and flavor.
Why This Matilda Cake Recipe Works
There’s a reason this Matilda cake recipe consistently delivers spectacular results:
- Balanced sweetness that satisfies without being cloying. The subtle bitterness of the cocoa and coffee beautifully balances out the sweetness, creating a harmonious flavor profile.
- Perfect moisture level from the combination of oil and hot coffee in the batter. Unlike butter-based cakes that can dry out, this cake stays moist for days.
- Deep chocolate flavor comes from using high-quality cocoa powder and enhancing it with hot coffee, which brings out the chocolate’s complex flavor notes.
- Nostalgic connection to a beloved childhood story makes this cake more than just a dessert – it’s an experience that brings literature to life.
- Impressive presentation that wows guests before they even take a bite. The towering layers and rich frosting create an unmistakable visual impact.
Conclusion
Creating your own Matilda cake is more than just following a recipe – it’s bringing a piece of literary magic into your kitchen. This chocolate masterpiece captures all the drama and decadence of that unforgettable scene while delivering a genuinely delicious dessert experience. The combination of moist, rich chocolate cake layers and fudgy frosting creates something truly special that’s worthy of its fictional fame.
Whether you’re hosting a book club, planning a special celebration, or simply treating yourself to an extraordinary chocolate cake, this recipe delivers all the wow-factor you’re hoping for. Each forkful offers that perfect balance of tender cake and creamy frosting that makes chocolate lovers swoon.
So channel your inner Bruce Bogtrotter, embrace the challenge, and prepare to amaze everyone (including yourself) with this spectacular Matilda cake. Unlike Bruce, you won’t have to eat it all in one sitting – but once you taste it, you might be tempted to try!
Frequently Asked Questions About Matilda Cake
What makes a cake a true Matilda cake?
A true Matilda cake features intensely chocolate layers, impressive height, and rich fudgy frosting. It should look substantial and dramatic, just like the cake from Roald Dahl’s story and the film adaptation, while delivering a deep chocolate flavor in every bite.
Can I make the Matilda cake ahead of time?
Absolutely! Your Matilda cake benefits from being made a day ahead, as the flavors deepen and meld together. Store it properly covered at room temperature or in the refrigerator, and bring to room temperature before serving.
Is the Matilda cake suitable for beginners?
While this Matilda cake looks impressive, our recipe breaks it down into manageable steps that even novice bakers can follow successfully. The oil-based batter is more forgiving than butter-based cakes, making it accessible for bakers of all skill levels.
Can I make a Matilda cake without coffee?
Yes, you can substitute hot water for coffee in your Matilda cake if needed. However, the coffee enhances the chocolate flavor without adding coffee taste, so using it is highly recommended for the best flavor profile.
How do I prevent my Matilda cake from drying out?
The key to a moist Matilda cake is not overbaking it. Check your cake 5 minutes before the suggested baking time ends, and remove it from the oven as soon as a toothpick comes out with just a few moist crumbs. Also, properly storing the cake covered will help maintain moisture.
What’s the best cocoa powder to use for Matilda cake?
For the most authentic Matilda cake experience, use a high-quality Dutch-processed cocoa powder, which provides a deeper, richer chocolate flavor. Natural cocoa powder will work in a pinch, but the Dutch-processed variety creates that classic dark color and smooth flavor.
Can I turn this Matilda cake recipe into cupcakes?
Absolutely! This Matilda cake batter works beautifully as cupcakes – just reduce the baking time to about 18-22 minutes. The recipe will make approximately 24 cupcakes, perfect for parties or sharing.
How tall should a proper Matilda cake be?
A classic Matilda cake should stand impressively tall – our two-layer version typically reaches about 4-5 inches high when frosted. If you want an even more dramatic presentation, consider making the three-layer variation.
Ready to Bake the Ultimate Matilda Cake?
This cake is a showstopper, and we can’t wait for you to try it! Follow the recipe step by step and treat yourself to a slice of pure magic. If you love it, be sure to drop a comment below and let us know how it turned out — or if you added your twist! Don’t forget to rate the recipe and share your feedback with us!
Share the love! If you think your friends would enjoy this delicious cake, share it on social media and tag us — we’d love to see your creations!
Stay in the loop! Follow us on Instagram/Facebook/Twitter for more baking inspiration, tips, and behind-the-scenes peeks at upcoming recipes. And if you don’t want to miss out on new, tasty posts, subscribe to our newsletter today!
Git more recipes you might like
- Top 10 Cake Recipes.
- Cookie Cereal Recipe.
- Artesano Bread.
- Aphrodisiac Chocolates.
- Perfect French Press Coffee.
- Venetian Ice Cream Flavors.
Did You Try Our Recipe?
There are no reviews yet. Be the first one to write one.