
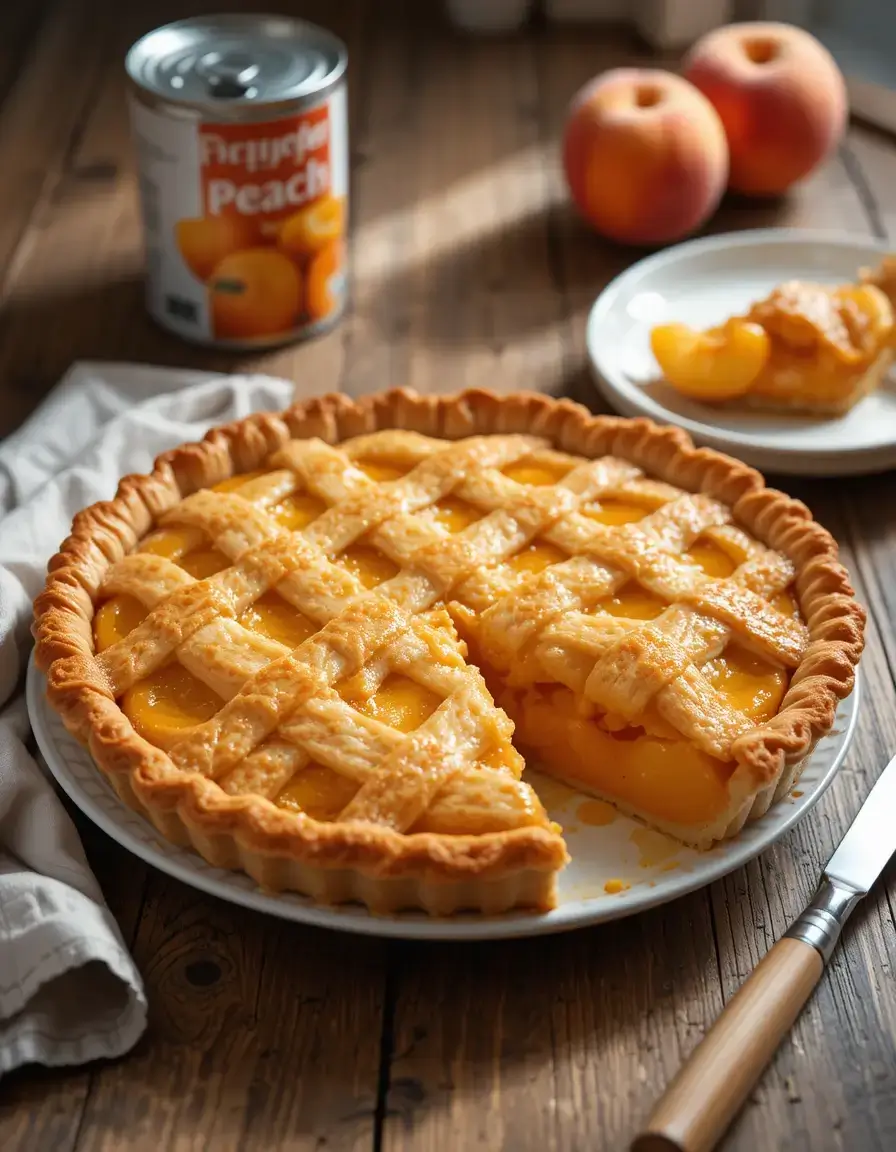
Canned Peach Pie
Canned peach pie is one of those heartwarming desserts that brings back memories of Sunday dinners, porch swings, and the sweet smell of something bubbling in the oven. Ain’t nothing like a warm peach pie straight from the oven — and guess what? You don’t need fresh peaches or fancy tools to make it happen.
With just a couple of pantry staples and a few simple steps, you can whip up a golden, gooey pie that tastes like you spent hours in the kitchen. Using canned peaches makes this recipe a year-round comfort food — no peeling, no fuss, just that rich, syrupy sweetness packed into every bite.
Whether you’re a beginner baker or just looking for a quick dessert to wow the family, this canned peach pie recipe is your new go-to. Stick around, and I’ll show you how to turn those humble canned peaches into a show-stopping pie that tastes like home.
Table of Contents
Why Canned Peach Pie Is a Game-Changer
When it comes to baking, especially pies, folks often think you need to start with fresh fruit to get that homemade taste. But let me tell you — canned peaches are the real MVP here. They’re sweet, soft, and ready to go right outta the can, making them perfect for a quick and easy canned peach pie.
No need to peel, pit, or slice anything. That means no sticky hands, no wasted fruit, and no guessing whether your peaches are ripe enough. With canned peaches, you get consistency in flavor and texture every time. Plus, they’re packed in syrup or juice, which adds even more flavor to your filling — all without the extra work.
And here’s the kicker: canned peaches are available all year long. Whether it’s the middle of summer or deep into winter, you can still serve up a slice of sunshine at your kitchen table. That’s what makes this easy peach pie recipe with canned peaches a true lifesaver for busy bakers, last-minute guests, or when that sweet craving hits.
So if you’ve been sleeping on canned fruit, it’s time to rethink things. Once you bake your first peach pie with them, you’ll wonder why you didn’t do it sooner.
My Latest Recipes

Vinícius Jr. Transfer to Chelsea: Truth Behind the Rumor, Facts & Insights

Before You Buy Exercise Equipment – Save Money & Time

You Won’t Believe What Ronaldo Just Said About African Football

Cristiano Ronaldo Fast & Furious 11 Trailer: Real or Viral Rumor?

This Was Never Supposed to Go Public – The PSG Leak Explained
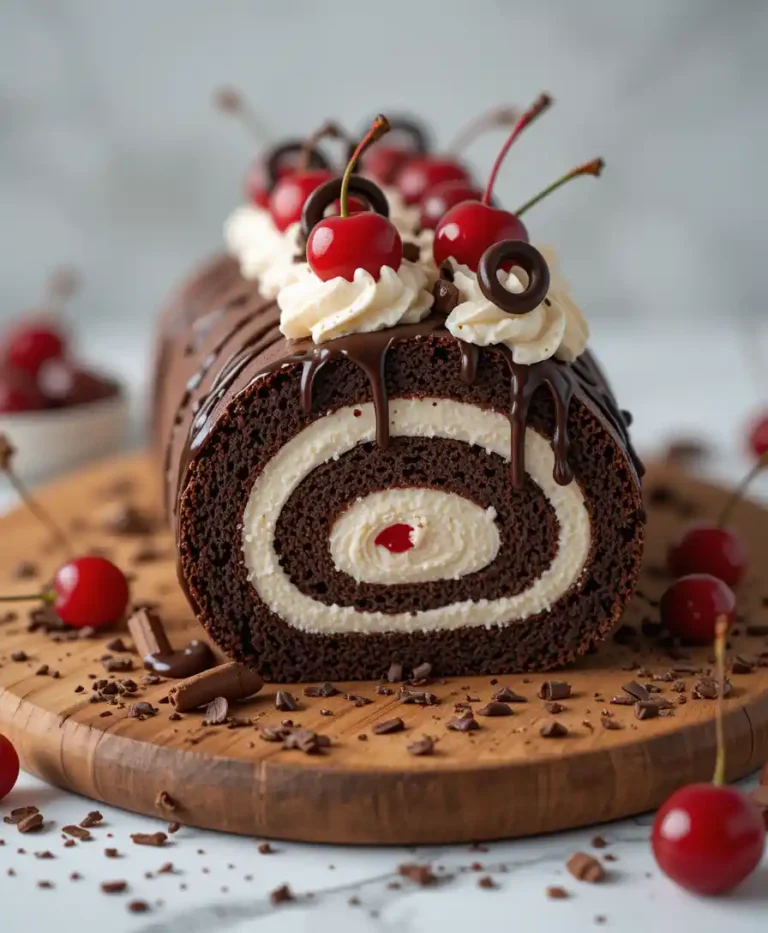
Chocolate Swiss Roll Cake
Ingredients You’ll Need for Canned Peach Pie
Making a peach pie from scratch doesn’t mean you need to start peeling fruit or making dough at sunrise. This easy canned peach pie recipe leans on store-bought staples and smart shortcuts, without sacrificing flavor. Here’s a breakdown of what you’ll need (and why each one matters).
Canned Peaches – The Star of the Show
You’ll need two 15-ounce cans of sliced peaches. You can use peaches in light syrup, heavy syrup, or natural juice, but here’s the trick:
- If using heavy syrup, drain about half the liquid to avoid an overly sweet filling.
- If using juice-packed peaches, keep more of the liquid and consider adding a tablespoon of brown sugar for depth.
The canned variety brings that soft, melt-in-your-mouth texture without the hassle of peeling, slicing, or waiting for fruit to ripen.
Sugar – But Not Too Much
Start with 1/2 cup of granulated sugar, and adjust based on the syrup level in your canned peaches.
Cornstarch – Your Secret Weapon
You’ll need 2 tablespoons of cornstarch to thicken the peach filling so it’s not runny.
If you don’t have cornstarch, you can use 1/4 cup of all-purpose flour instead — it’ll give the pie a slightly heartier texture.
Warm Spices – Just Enough to Comfort
- 1 teaspoon cinnamon gives that familiar bakery scent and warmth.
- 1/4 teaspoon nutmeg is optional, but it adds a subtle depth that pairs beautifully with peaches.
A Splash of Something Bright
Add 1 tablespoon lemon juice to balance the sweetness and wake up the flavors. It’s a small touch that makes a big difference. Bottled or fresh — both work.
Vanilla Extract – For That Cozy Finish
Just 1 teaspoon of vanilla rounds out the flavor and adds that bakery-style aroma we all know and love.
Butter – A Classic Pie Trick
Dot 1 tablespoon of butter over the filling before sealing the crust. It adds richness and helps everything bubble up beautifully in the oven.
Pie Crust – Store-Bought or Homemade
Use one double pie crust, enough for a bottom and top layer.
- Store-bought refrigerated crust is great for convenience.
- If you want to go all-in, a homemade butter crust adds an extra touch of love.
You can do a solid top, a lattice crust, or even cut out little shapes for a rustic look.
Egg Wash – For That Golden, Glossy Finish
Whisk 1 egg with 1 tablespoon of milk or water, then brush over the top crust before baking. It gives your pie that perfect golden shine.
This ingredient list isn’t just a checklist — it’s a guide to making a canned peach pie that looks homemade, tastes comforting, and comes together in a snap. Now that your ingredients are prepped, let’s turn them into something sweet and unforgettable.

Step-by-Step Instructions: How to Make Canned Peach Pie
You don’t need to be a pastry chef to make this pie — just follow these easy steps, and you’ll have a golden, bubbling canned peach pie fresh out of the oven in no time.
Step 1: Preheat the Oven
Set your oven to 400°F (200°C) so it’s nice and hot by the time your pie is ready to go in. A well-preheated oven helps the crust bake evenly and keeps the bottom from getting soggy.
Step 2: Prepare the Pie Filling
In a large mixing bowl, combine:
- Drained canned peaches
- Sugar, cornstarch, cinnamon, nutmeg, and lemon juice
- Vanilla extract
Tip: If your peaches seem overly juicy, spoon out a little of the liquid so your pie isn’t too runny.
Step 3: Roll Out the Bottom Crust
Place one crust into a 9-inch pie dish, pressing it lightly into the bottom and sides. Let a little overhang around the edges — you’ll need that to seal the top later.
Optional: Sprinkle a teaspoon of flour or crushed graham crackers over the bottom crust to absorb extra juice and keep it crisp.
Step 4: Add the Filling
Pour your peach mixture into the pie shell. Spread it out evenly and dot the top with small pieces of butter. This adds a glossy, rich finish to the filling once baked.
Step 5: Add the Top Crust
Place the second crust over the top. You can go with a traditional full crust, make a lattice, or cut out shapes for a more decorative look.
Seal the edges by pinching or crimping with a fork, then trim off any excess dough. Don’t forget to cut a few small slits in the top if using a full crust — this lets steam escape while baking.
Step 6: Brush with Egg Wash
Mix one beaten egg with a tablespoon of water or milk. Brush it lightly over the top crust to help it turn a beautiful golden brown in the oven.
Optional: Sprinkle a little sugar on top for a sparkly, crunchy finish.
Step 7: Bake
Place the pie on the center rack and bake for 45 to 50 minutes, or until the crust is golden and the filling is bubbling up through the vents.
If the edges of your crust start to brown too quickly, cover them loosely with foil or a pie shield to prevent burning.
Step 8: Cool Before Serving
Let the pie cool for at least 2 hours before slicing. This gives the filling time to set, so you get clean, juicy slices instead of a runny mess.
Now you’ve got yourself a classic, home-baked peach pie made with canned peaches — no hassle, no fuss, just that sweet southern-style goodness in every bite.
Pro Tips to Make Canned Peach Pie Taste Homemade
Using canned peaches is already a smart shortcut, but with a few extra touches, your pie will taste just like the one grandma used to make — maybe even better. Here’s how to take your canned peach pie from basic to bakery-worthy.
- 1. Don’t Skip the Spices
- Even a pinch of cinnamon and nutmeg can transform your filling. Want to take it up a notch? Add a dash of ground ginger or cardamom for a warm, complex flavor that feels like it’s been slow-cooked all day.
- 2. Layer in a Bit of Texture
- For extra richness, sprinkle a little brown sugar or crushed graham crackers on the bottom crust before adding the filling. This trick keeps the crust from getting soggy and adds a caramelized, nutty layer of flavor.
- 3. Use Butter — the Real Kind
- Dotting real butter over the filling (before adding the top crust) makes a world of difference. It gives the pie a silky texture and adds depth that canned fruit alone can’t deliver.
- 4. Add a Splash of Something Special
- Just a teaspoon or two of bourbon, dark rum, or almond extract can bring out the peach flavor and add a homemade touch. You don’t need much — just enough to make people say, “What’s your secret?”
- 5. Go for a Lattice or Decorative Crust
- A homemade look goes a long way, even if you’re using store-bought dough. Braiding strips of crust, cutting out little hearts or leaves, or doing a simple lattice makes your pie look straight out of a bakery window.
- 6. Let It Rest (Yes, Really)
- Once it’s out of the oven, don’t dive in right away. Letting your pie cool for at least two hours helps the filling thicken properly — and that’s how you get clean, Instagram-worthy slices.
- 7. Serve It Right
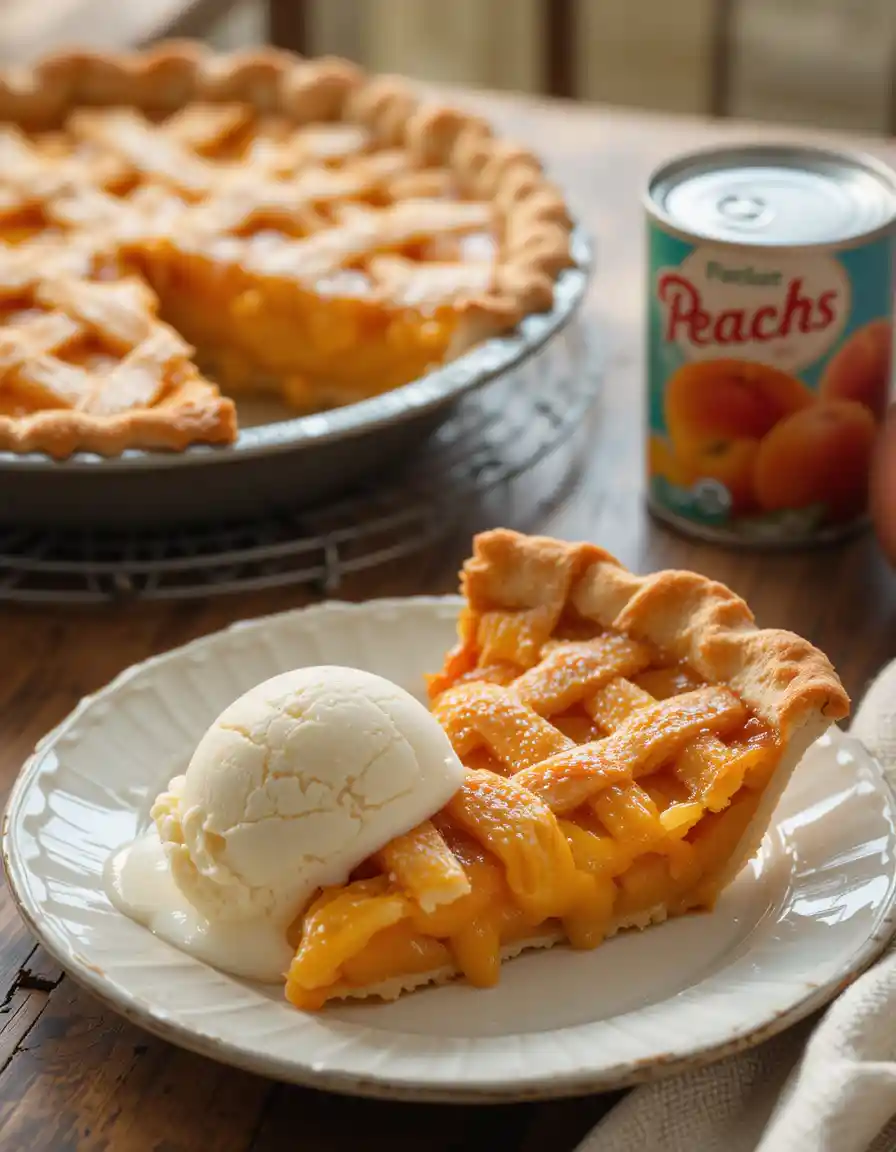
- Warm slices are great on their own, but a scoop of vanilla ice cream or a dollop of fresh whipped cream adds that final homemade flourish. Bonus points for a drizzle of caramel sauce.
With these simple tricks, your easy canned peach pie will taste like it came from a farmhouse kitchen, not a shortcut recipe. Little things go a long way when it comes to comfort food.

Variations & Serving Ideas for Canned Peach Pie
Sometimes, sticking to the classic is the way to go. But if you’re feeling a little adventurous or just want to switch things up, here are some tasty variations and serving ideas to make your canned peach pie even more exciting.
1. Crumble Topping Instead of a Crust
Skip the top crust and sprinkle a buttery streusel crumble made from flour, brown sugar, and butter. It adds a crunchy, sweet contrast to the soft peaches and gives your pie a homemade bakery vibe.
2. Add Other Fruits
Mix in a handful of fresh or frozen berries, like blueberries or raspberries, for a burst of color and flavor. You can also try adding sliced apples or pears for a fall-inspired twist.
3. Mini Peach Pies
Make individual pies using muffin tins or small ramekins. These are perfect for parties or when you just want a little treat without the commitment of a full pie.
4. Peach Cobbler Style
If you’re short on pie crust, try making a peach cobbler by topping the canned peach filling with biscuit dough or drop biscuits before baking. It’s easier to throw together and just as comforting.
5. Serve with Ice Cream or Whipped Cream
Nothing beats a warm slice of peach pie with a scoop of vanilla ice cream melting over the top or a generous dollop of freshly whipped cream. For an extra touch, sprinkle some cinnamon or nutmeg on the cream.
6. Drizzle with Caramel or Honey
A drizzle of caramel sauce or a bit of local honey adds a sweet, sticky finish that pairs perfectly with the peaches’ natural flavor.
7. Gluten-Free or Vegan Options
For those with dietary needs, try a gluten-free pie crust or a vegan crust made with coconut oil or vegan butter. You can also swap regular sugar for coconut sugar or maple syrup to keep it natural and wholesome.
With these variations and serving ideas, your easy canned peach pie can fit any occasion, from a casual family dinner to a festive celebration.
My Latest Recipes
Vinícius Jr. Transfer to Chelsea: Truth Behind the Rumor, Facts & Insights
Before You Buy Exercise Equipment – Save Money & Time
You Won’t Believe What Ronaldo Just Said About African Football
Cristiano Ronaldo Fast & Furious 11 Trailer: Real or Viral Rumor?
This Was Never Supposed to Go Public – The PSG Leak Explained
Chocolate Swiss Roll Cake
Storage & Make-Ahead Tips for Canned Peach Pie
Keeping your canned peach pie fresh and delicious doesn’t have to be tricky. Whether you want to prepare ahead of time or save some leftovers, these tips will help you enjoy that homemade taste whenever you like.
Cooling Down Properly
After baking, let your pie cool completely at room temperature for at least two hours. This resting period is key to allowing the filling to thicken and set, making slicing easier and cleaner.
Refrigeration Done Right
Once cooled, wrap your pie loosely with parchment paper or beeswax wrap before placing it in the fridge. This breathable layer helps prevent the crust from getting soggy or absorbing fridge odors. Your pie should stay tasty for up to 5 days when stored this way.
Freezing Like a Pro
For longer storage, freeze your peach pie before baking or after it’s fully baked and cooled.
- Unbaked Freezing: Assemble your pie, wrap it tightly with plastic wrap and foil, then freeze for up to 3 months. When ready to bake, no need to thaw — just add a few extra minutes to the baking time.
- Baked Freezing: Cool the pie completely, then wrap it well and freeze. When reheating, thaw overnight in the fridge, then warm in a 350°F oven for 15-20 minutes to bring back that fresh-baked crust texture.
Make-Ahead Filling Prep
Mix your canned peaches with sugar, spices, and thickener a day ahead and store in an airtight container in the fridge. This gives the flavors time to marry and intensify, resulting in a richer filling when baked.
Pie Crust Prep in Advance
You can roll out and chill your pie crust a day or two before baking. Wrap it tightly in plastic wrap to prevent drying out. Having the crust ready ahead saves you time on baking day and helps ensure a flakier result.
Tips for Reheating Leftover Pie
Warm leftover slices gently in the oven (about 300°F for 10-15 minutes) rather than the microwave to keep the crust flaky and the filling perfectly gooey.
With these storage and prep tips in your back pocket, you can make your canned peach pie ahead of time or keep leftovers tasting fresh without any hassle. It’s all about making your baking experience easier and your pie just as delicious every time. Next up, we’ll take a quick look at the nutritional info, so you know exactly what’s on your plate while enjoying this sweet, comforting treat.
| Nutritional Information & Recipe Details | |
|---|---|
| Preparation Time | 15 minutes |
| Cooking Time | 45–50 minutes |
| Total Time | About 1 hour |
| Type | Dessert / Pie |
| Cuisine | American / Southern |
| Recipe Yield | 8 servings |
| Calories (per serving) | Approximately 320 kcal |
Conclusion- Thanks for Joining Me on this Canned Peach Pie
Making this canned peach pie was a joy from start to finish. I loved how simple pantry ingredients turned into a warm, comforting dessert that felt truly homemade — no fuss, no fancy tools, just good old-fashioned flavor. Whether you’re a seasoned baker or just starting, this recipe proves that shortcuts like canned peaches don’t mean compromising on taste.
Thank you so much for spending time here and letting me share this recipe with you. If you enjoyed this one, be sure to check out more of our easy and delicious pie recipes and dessert ideas. There’s plenty more sweet inspiration waiting for you!
My Related Recipes You Will Love
Frequently Asked Questions About Canned Peach Pie
Q1: What’s the best way to prevent a soggy bottom crust when making canned peach pie?
One simple trick is to sprinkle a thin layer of crushed nuts, breadcrumbs, or even crushed graham crackers on the bottom crust before adding the peach filling. This helps absorb extra moisture from the canned peaches and keeps the crust nice and flaky.
Q2: Is it necessary to add lemon juice to the canned peach pie filling?
While not mandatory, lemon juice brightens the flavors and balances the sweetness of the canned peaches. It adds a subtle tang that makes the pie taste fresher and more complex.
Q3: Can I add other spices besides cinnamon and nutmeg to canned peach pie?
Absolutely! Spices like ginger, allspice, or a dash of cloves can add interesting layers of flavor. Just be cautious with strong spices so they don’t overpower the delicate peach taste.
Q4: How can I make my canned peach pie look more decorative without extra effort?
Try cutting simple shapes (like stars or leaves) out of the top crust dough and placing them on top before baking. Alternatively, creating a lattice crust adds a classic look with minimal extra work.
Share your thoughts or questions about the recipe in the comments below!